“What is the right way to setup my Real Estate listings in QuickBooks Online?”
A question frequently asked by customers in the Real Estate industry. This post is my attempt to share with you what we’ve learned and try to answer this question.
A bit of background on QuickBooks Online, Real Estate professionals and how we’ve learned what we know.

QuickBooks Online is remarkably popular accounting application among the Real-Estate Agents, Brokers and Mortgage professionals. It is feature rich, available at a very attractive price, and it’s quite easy to use. With just a bit of your time (or help from a professional, if you are willing to spend a few pennies), it will give you visibility into your business finances and make tracking, preparing the end of year taxes, 1099’s, reporting and being able to make financial decisions a breeze.
At ApiNation, QuickBooks Online is one the most integrated applications. We have a large variety of workflows for syncing your data, automating everything I describe in these posts, and we continue to build and add new workflows and options. These integration workflows, automate data entry and are used by customers to instantly sync their Real Estate Back Office, Customer Relationship Management (CRM), email and marketing tools, MLS, Sales Force and other software with QuickBooks Online. To create the automation and integrations, we had to observe hundreds of customers and learn all the detailed ways to setup and track Real Estate listings and transactions, so we can create integrations which work right and make your job easier.
How to enter Real Estate Listing into QuickBooks Online.
Because QuickBooks Online is a universal small business accounting software and wasn’t built exclusively for Real Estate professionals, you have choices on how you enter your transactions. The decision ultimately comes down to what you want to see about your transactions income and expenses in QuickBooks reports.
In this tutorial, I will cover one of the ways, a set up of listings in QuickBooks by using a customer you are working with and entering a listing as a sub-customer (aka a job) for that customer. Setting up your transaction as sub-customer gives you quite a few options on your reports. Experiment with it, and if this does not work for you, try one of the other methods I describe.
Complete step-by-step of how to manually setup a customer and then setup each listing as a sub-customer.
STEP 1
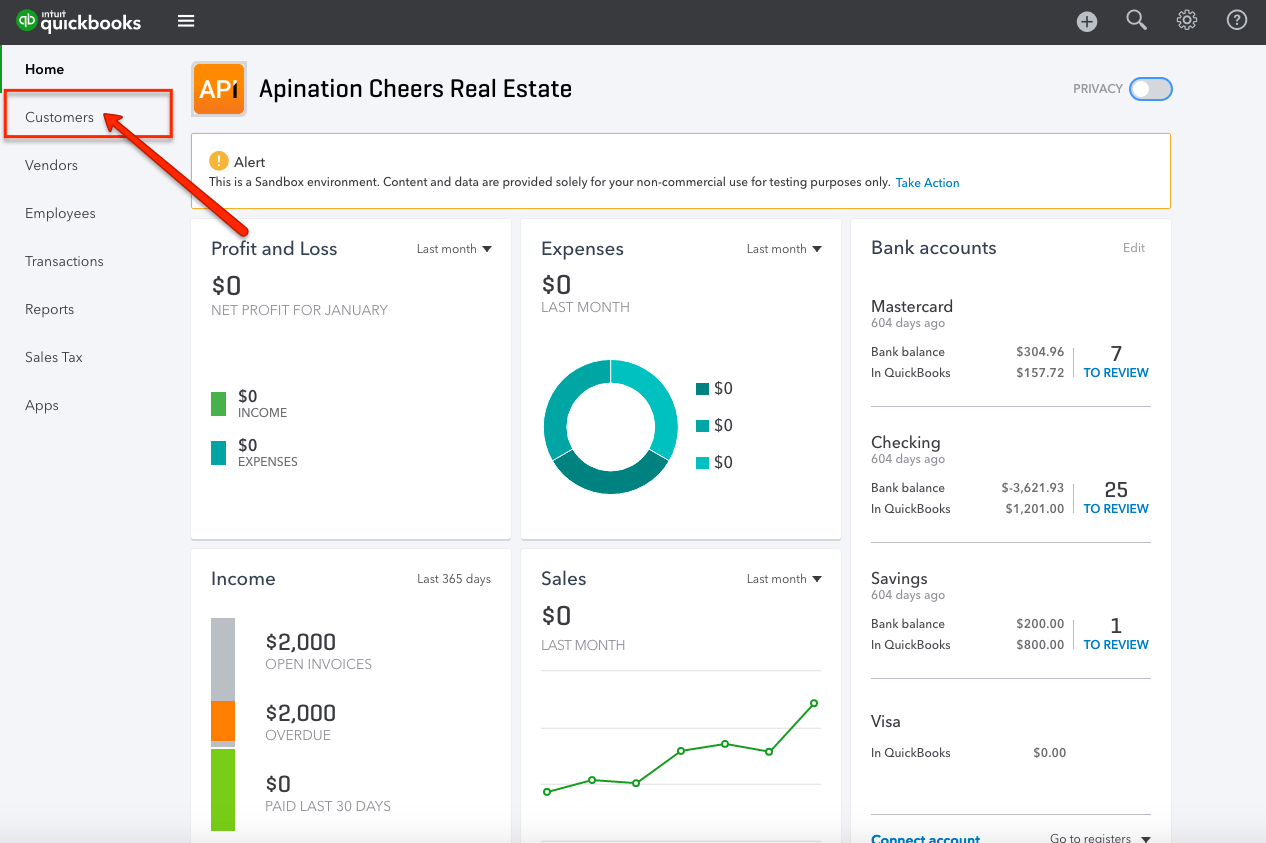
Open your QuickBooks Online, and click on the “Customers” as shown in the image. In some versions of QuickBooks Online this option might be called “Sales.”
STEP 2
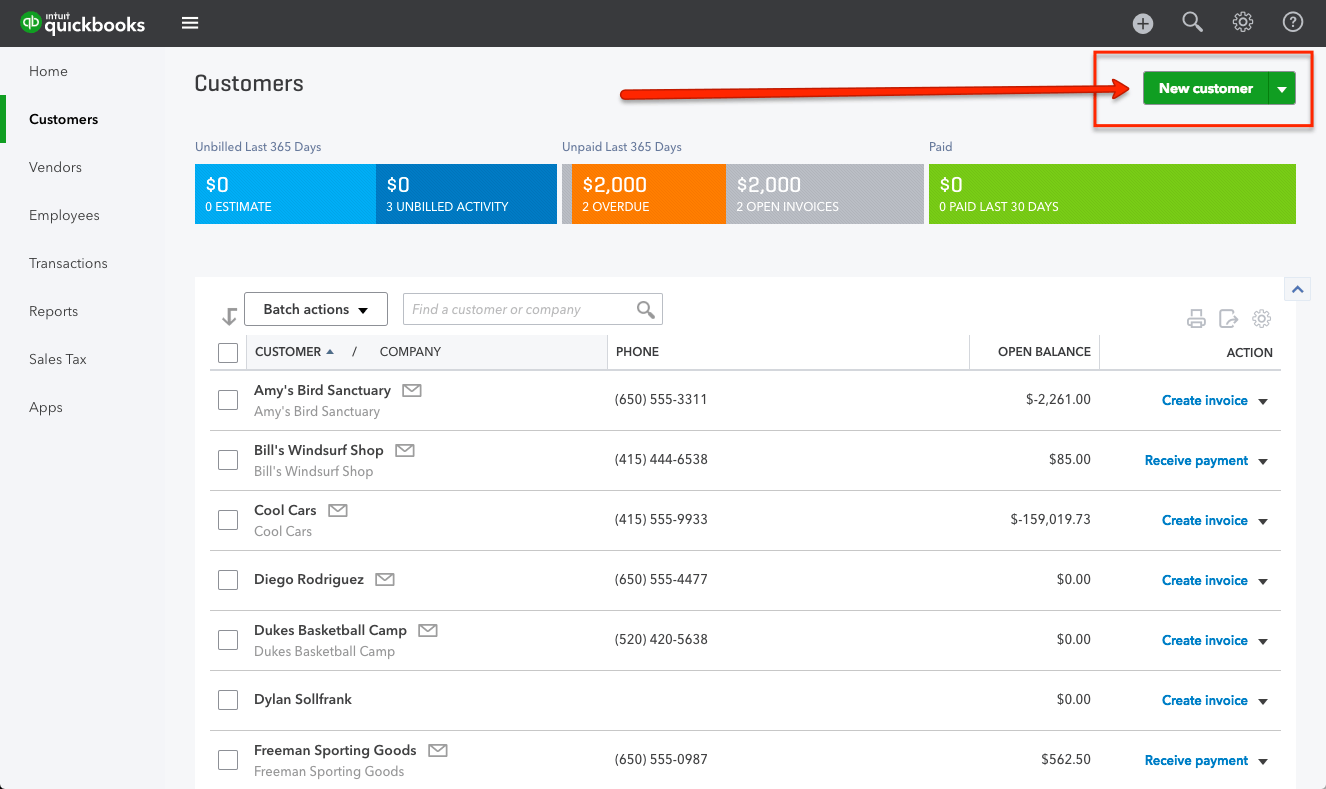
After selecting “Customers,” the page shows you your entire customer list. To add a new one click on “New Customer” located on the upper right corner of the screen as shown in the picture below.
STEP 3
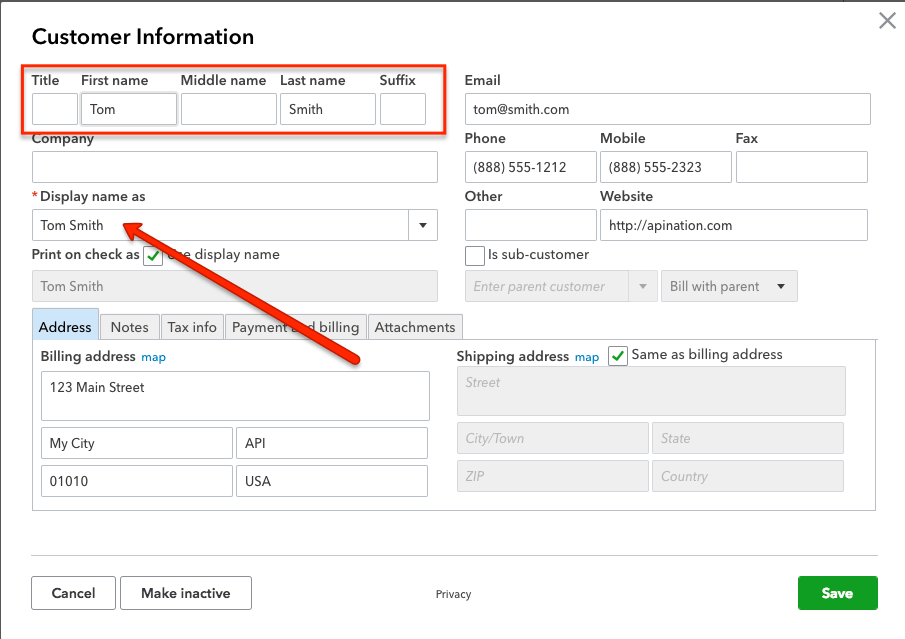
The “New customer” button will open the “Customer Information” form where you enter your customer data. On this form, you can add as much information about your client as you want, but at a minimum add customer name, as the first name and last name. I am using a sample name, “Tom Smith,” in the picture below.
After entering the name save this customer by clicking on the “Save” button at the right bottom corner shown in the picture. Your customer is now on in customers list in QuickBooks.
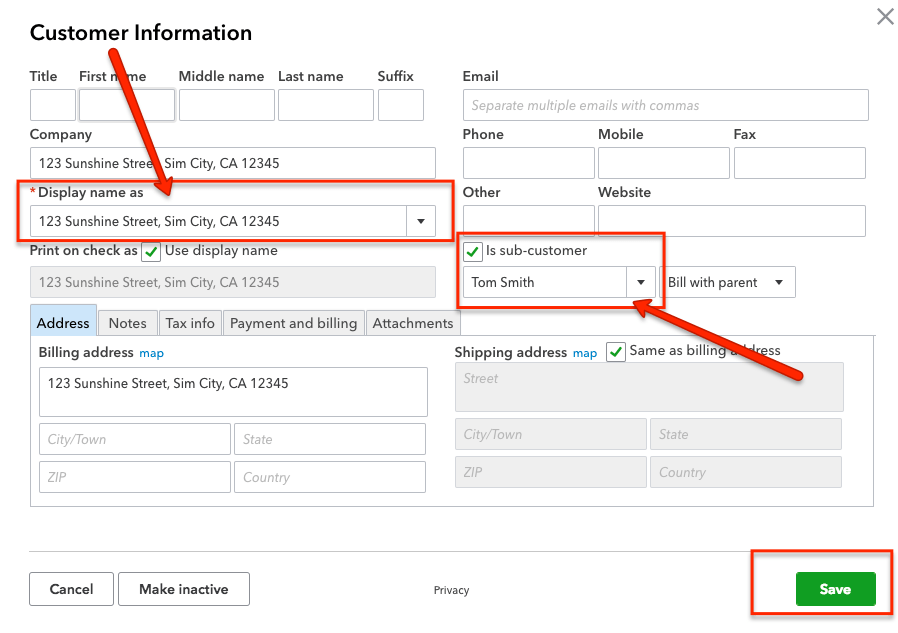
In this step, you are adding a listing to track your Real Estate transaction. To do that, you are going to create another “New Customer,” by following the same steps as described in STEP 2, but this time you going to use a property address of your customer. In addition, you are going to select the checkbox “Is sub-customer” and from the “Drop down” list, choose the customer you created in Step 2 ( in my example it was “Tom Smith”). Save this form by clicking on the “Save” button on the right bottom corner of the picture, and this creates the customer with the name of property address.
You can find your customers and your listings by clicking on the “Customers” list again as shown in Step 1.
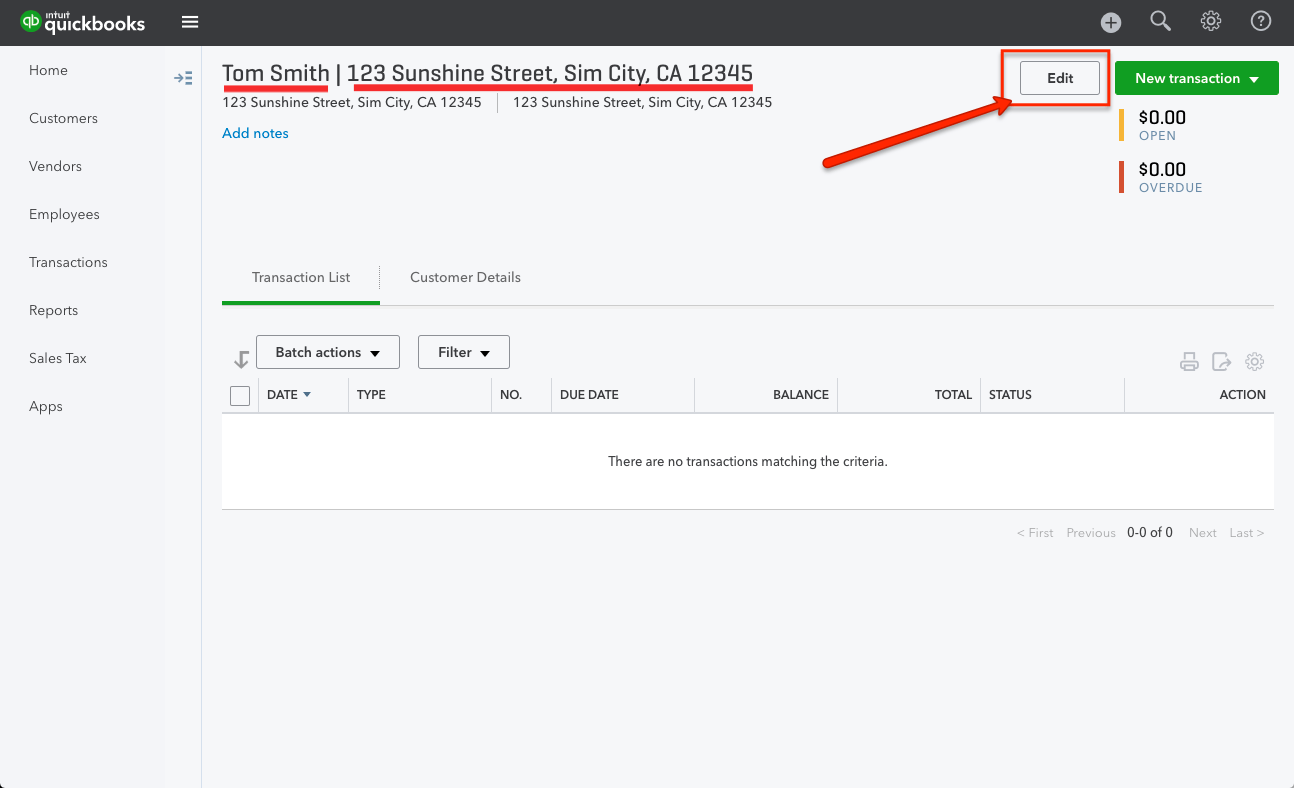
In case you made a mistake or need to add more information about your customer the listing. Select the customer you want to edit from the list of all customers, and click the “Edit” button located in the top-right corner of your screen.
When you click on the “Edit,” the customer form will open again. Make the changes you need and click “Save.”

