Intuit provides an application called QuickBooks Web Connector to safely connect to QuickBooks Desktop.
QuickBooks Web Connector works only on Windows PCs. Mac users will need to run QuickBooks Desktop from a virtual PC to maintain integration with API Nation and other web-based applications.
Step 1: Download and install Web Connector
Go to the official Intuit download page and download the correct version of QuickBooks Web Connector which works with your version of QuickBooks Desktop:
Version 2.2.0.71
- U.S. editions of QuickBooks Financial Software products
- QuickBooks Enterprise Solutions (2015 or later)
- QuickBooks Premier (2015 or later)
- QuickBooks Pro (2015 or later)
- Canadian editions of QuickBooks (2015 or later)
- UK editions of QuickBooks (2015 or later)
Version 2.2.0.34
- U.S. editions of QuickBooks Financial Software products
- QuickBooks Enterprise Solutions (2015 or later)
- QuickBooks Premier (2015 or later)
- QuickBooks Pro (2015 or later)
- Canadian editions of QuickBooks (2015 or later)
- UK editions of QuickBooks (2015 or later)
Version 2.1.0.30
- U.S. editions of QuickBooks Financial Software products
- QuickBooks Enterprise Solutions
- QuickBooks Premier (2002 or later)
- QuickBooks Pro (2002 or later)
- QuickBooks Simple Start (2006 or later)
- QuickBooks Point of Sale (v.4.0 or later)
- Canadian editions of QuickBooks (2003 or later)
- UK editions of QuickBooks (2003 or later)
Install the downloaded Web Connector on the computer with your copy of QuickBooks Desktop installed.
Step 2: Download the configuration file
The QuickBooks Web Connector configuration file (QWC file) contains all connection information the Web Connector needs to connect to a web service, except the password.
- Sign in to your API Nation account.
- Navigate to Apps and find QuickBooks Desktop. Click the toggle:
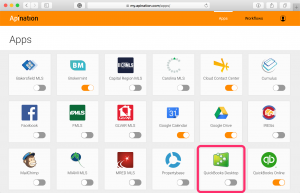
- You’ll be directed to the Integrate with QuickBooks Desktop page, which contains a short version of this tutorial.
Hit Apination.qwc.
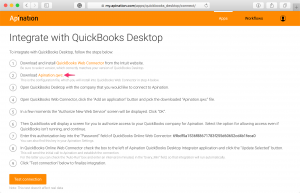
Save the file to a location on your computer.
When connecting to a QuickBooks file that is hosted on a remote server or virtual server, make sure to save the QWC file to the same server where QuickBooks Desktop is installed.
Step 3: Add API Nation to Web Connector
- Open QuickBooks Desktop to the company file you’ll be using.
- Open Apination.qwc and click OK to proceed:
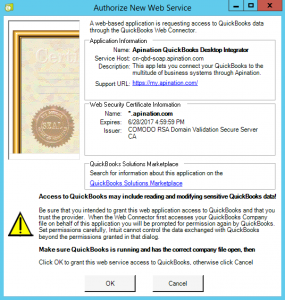
Step 4: Grant access to API Nation
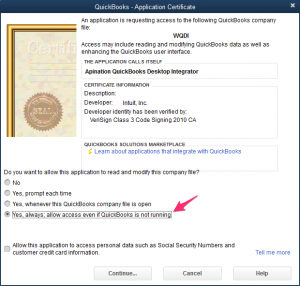
When the QuickBooks – Application Certificate dialog opens, choose Yes, always; allow access even if QuickBooks is not running.
Step 5: Enter your authorization key
- Switch back to API Nation, Integrate with QuickBooks Desktop page.
Copy your personal authorization key:
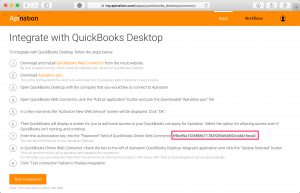
You can also find you authorization key under Settings:

- Return to QuickBooks Web Connector.
Paste your authorization key in the Password field next to Apination QuickBooks Desktop Integrator:
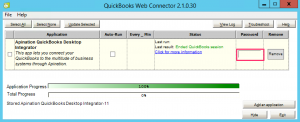
Step 6: Establish the connection to Apination
- Select the checkbox next to Apination QuickBooks Desktop Integrator and click Update Selected at the top of the dialog:
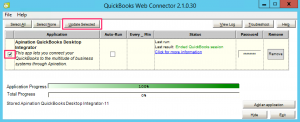
This will initiate a request to API Nationweb service. - Once Total Progress is complete, switch back to API Nation, Integrate with QuickBooks Desktop page.
Click Test connection:
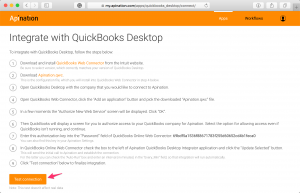
This will initiate processing of the request received from QuickBooks Web Connector.
Once the connection is established, you’ll be directed to the Apps page in API Nation and the following snackbar will show up at the bottom of your screen:
Hit PICK WORKFLOW and proceed with reviewing the available integration scenarios.

